Because one of the services we offer is kiln repair, we get calls on a daily basis about various kiln mishaps. Some of these inquiries are challenges, which we do our very best to meet; others, however, are totally the type of issues that most kiln owners are able to address themselves, once they know what's going on. That's one of the great things about ceramics, right? You wind up doing or making or fixing all of these things that seem like they might be really difficult, until you actually do them! In the spirit of this sentiment, I've written a quick how-to for troubleshooting a fairly specific, but fairly common problem that we get calls about weekly -- your overfiring manual kiln.
Of course, there are many reasons as to why your manual kiln might be overfiring. You may need a new thermocouple, or you may have a burned-out element that is causing another element to work double-duty, resulting in a kiln hot-spot. However, the most common reason we have encountered is so simple, but so small you might not even think to check on it -- plus, it's a very quick at-home fix, so this certainly can't hurt to try as your first line of inquiry when attempting to fix your overfiring manual kiln by yourself.
Above, you see a pretty typical kiln sitter -- a Dawson LT-3, which is a very common model found on older kilns. Notice how the switch is in the 'down' position -- that's the position that switch will most likely be in for 99% of its existence. And that's fine! However, that is specifically what can lead to your kiln overfiring over time.
The reason for that is insidious gravity. Over time, that little metal plate -- the one that your kiln sitter switch latches on to when you set your sitter cone -- slides down in minuscule, imperceptible increments.
This means, of course, that when your switch is flipped into the 'UP' position -- that is, when a sitter cone is in place and you're firing your kiln -- that plate has actually migrated UP too far. The higher the plate, the more your sitter cone needs to melt to allow the latch to release the switch, turning your kiln off.
This fix is easy. Just using a teeny tiny Allen wrench, loosen the bold on the front of the switch, and with the switch in the UP position, slide the plate down very slightly, like a couple millimeters. Keep in mind the delicate nature of kiln calibration -- a very small distance can make a big difference! At this point in the fix, you can mark the front of the plate with a mechanical pencil to note the position it is in. Then, if you are able to do a test firing with cones -- say, pop a few 06's into a kiln full of bisque work, as bisque temperatures have a little more wiggle room in terms of workable firing temperatures -- you can compare your plate's position with the 'true' heat inside of the kiln. You may need to fiddle with the plate yet again, but once you have it marked and the calibration seems good, you will find this easier to fix in the future, and something you can keep an eye on over time.
If you need a new kiln sitter -- or any part! -- for your kiln, check out our website's kiln part section here. We should have what you need! And if we don't, just give us a call at 215-427-9665 and we can find it for you.
Tuesday, April 22, 2014
Thursday, April 10, 2014
Ware Repair
Now that we've recovered from NCECA, we've started to tally the products that seemed to do well at the conference. One product that we knew would do well -- and did -- is a product that we developed ourselves last year. Ware Repair is basically our own version of a greenware or bisqueware 'glue' that can be fired, and our first time trotting it out to the public was at NCECA in 2013.
Over the past year, we've performed additional tests on the product, heard a lot of feedback from customers, and used it quite a bit on our own projects. On that tip, I figured this would be a good opportunity to share with you OUR experiences using a product that we make.
Here we have a mug made by our tech, Rachel. This mug is great because it's literally a showcase of many of our products - from the translucent Cotton Candy glaze that you see on the upper portion of the vessel to the White Gloss glaze with a Black Wacky Wax design. Notice along the upper interior rim there is a visible crack - this is a fracture that has been repaired with Ware Repair. Rachel accidentally broke this mug after it had been bisqued, but she was able to repair it with Ware Repair. The only reason the crack is visible here is because she opted to use a translucent glaze -- specifically to see how Ware Repair fared. And hey! It fared well!
Totally functional.
So that's what Ware Repair looks like when you use it for a very realistic situation. Our testing results often cause us to fabricate giant ceramic worst-case scenarios, though, which I personally love. I mention this because below, I've included a few images of a pot that was smashed, then re-assembled using Ware Repair, while green, and was then taken through all subsequent phases of firing. It's not necessarily pretty, but it is kind of awesome. At least that's what I recall thinking when I cracked the kiln!
Before I cracked any kilns, though, I cracked the pictured pot into approximately 1,000 pieces. Well, it was probably closer to ten pieces, but still. In the image above, you can see just how destroyed this form would have been, while it was still green. YES, any degree of ceramic instruction would dictate that you recycle such an accident, right? However, there are always exceptions, and elementary schools seem to be the biggest source of those. Over the years, we've gotten many calls from frantic teachers who are desperate for a way to repair broken student work. Sometimes things just get knocked around on a shelf; sometimes little kids just don't function as the best clay architects. Whatever. The point is, is this has ever been a problem you've encountered, just keep a bottle of Ware Repair on hand in your classroom or studio and you won't have to worry about tears, guilt, waste, or regret.
OK, that's a tall promise, but check out how this stuff works on gravity-based issues!
In the image above, you are looking at a handle that was completely broken off of the vessel in the green state -- repaired with ware Repair, it made it through bisque, and then through a cone 6 glaze firing, without falling off. Gravity was our toughest opponent as we developed this product, but as you can see, we really did our best to conquer it.
If you have any questions about this product or any of our other products, please don't hesitate to get in touch -- as you can see, we use everything we supply, simply because so many of us are potters ourselves! I'll leave you with one final awesome image of the mug that Rachel made, then broke, then Ware repaired, then awesomely glazed:
Mug by Rachel Sturino
Rachel, my birthday's in February. Just sayin'.
Monday, March 24, 2014
NCECA success!
The NCECA crew: Samson (production manager), Mark (owner),
Vicki (school accounts and store manager) and Gina (web content)
Wow, we had a great time at NCECA - and we'd like to extend a huge THANK YOU to everyone who stopped by our both in the exhibitor hall. It was awesome seeing a lot of familiar faces from the Philadelphia area, and it was really cool to meet a lot of our web customers face-to-face for the first time. Not to mention all of the new people we got a chance to chat with! At any rate, we're so glad that you're our customers -- we had a lot of interesting chats, learned a lot of cool new things ourselves (we looooove feedback!) and had a lot of laughs, so thanks for being awesome.
For those who didn't make it out to Wisconsin, though, I figured I'd post some highlights of our trip today. So, spoiler -- Milwaukee is an AWESOME city. Considering all of the amazing artists scattered around the state, it really was a great location for this year's conference.
Vicki and Samson are totally cheesy.
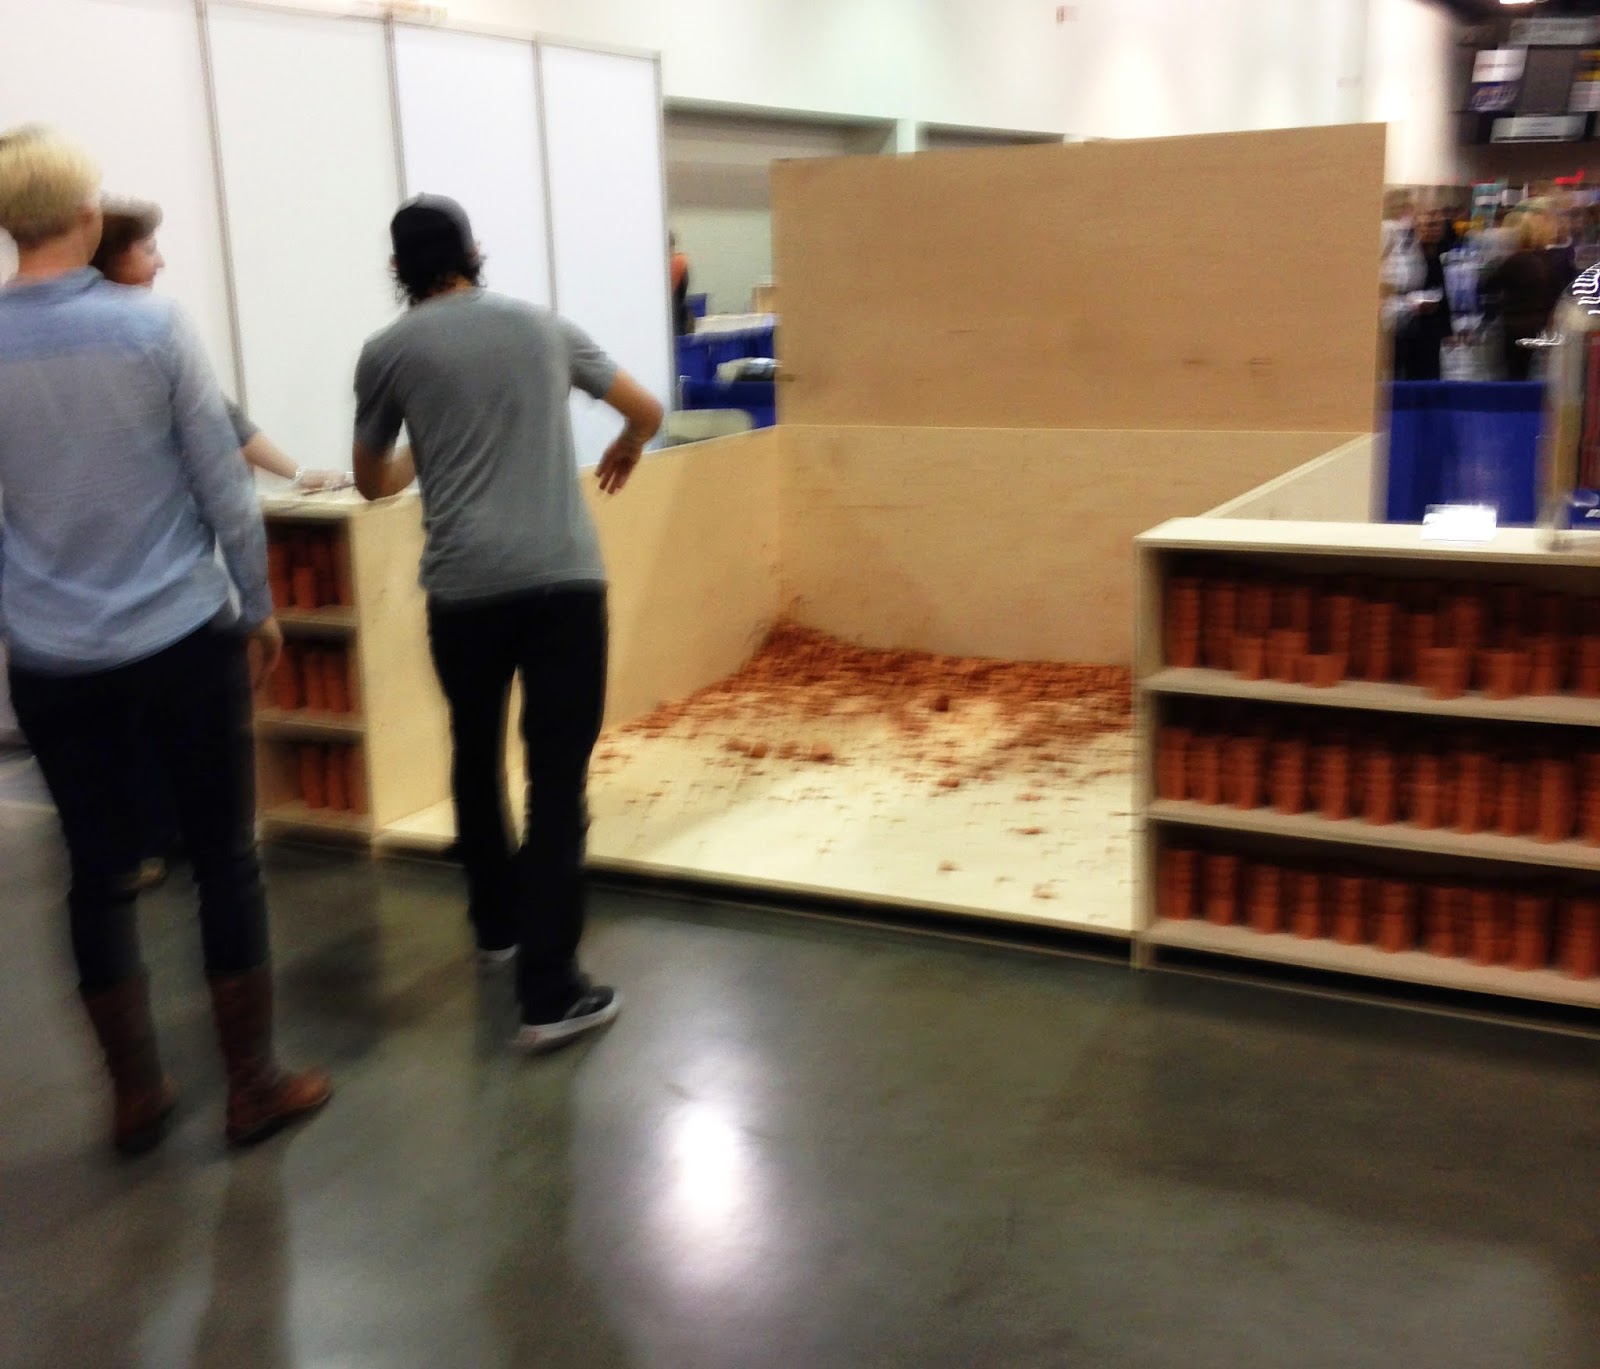
There were a ton of amazing installations, but the one I've posted below was probably my favorite -- Nichole Howard set up an amazing Kickstarter project that consisted of water, coffee, a bunch of little tiny terra cotta mugs, and a box in which to smash them upon finishing your beverage. Cathartic, destructive, and just generally rad. Don't worry, Nichole's plans include recycling all of the unfired pottery.
Also, Samson and I agreed that
this coffee was just really gooooood.
Samson relieves some rage.
The funny thing about NCECA is how we traveled halfway across the country and wound up spending a lot of time with other Philly folks. Our friends from The Clay Studio put on an amazing exhibition in honor of their 40th anniversary, featuring some breathtaking work by a wide variety of artists, including Ceramic Shop favorite Peter Morgan. Hey, Peter, if you're reading this -- great duck! So many pieces in that show were amazing, but I'll leave you with just one image, a detail of Linda Cordell's Lincoln Vignette (2013):
Vicki and I stood and stared at this porcelain rat for a looonnnngggg time.
Another fairly mind-blowing exhibition was the Archie Bray Foundation's showcase. Unsurprising that this ceramics mecca put forth an incredible show, but still deserves a mention. The Foundation's Resident Artist Director, Steven Young Lee, is a resident artist there himself, and his current work results in forms that have been intentionally deformed or 'damaged' by the firing process. How many times have you taken a waster out of a kiln and thought, 'Wow, that unexpected result is actually really cool'? If you're like me, that happens roughly once a week, which either speaks to my eternal optimism or my terrible technical skills. At any rate, here's his contribution to the Bray show:
Steven Young Lee
So, lots of cool stuff to see -- but we hardly stayed inside of the convention center the whole time. Milwaukee is an awesome and a big part of NCECA is catching up with far-flung potter friends, sometimes over an adult beverage. Luckily, Brew City had a ton of amazing options for doing just that. Microbrews everywhere! The food was really good, too. We had an awesome dinner at the gastropub Hinterland with our friends from Spectrum Glazes and had a pretty amazing and wild night at the Safe House, which was a great bar and definitely worth a visit if you find yourself in Milwaukee, particularly if you want to check out Mr. Blackjack -- a dead ringer for Christopher Walken.
$5 buy-in for spoof black jack -- SO fun.
Here Samson goes ALL IN. He, uh, lost.
We also made it out to the Milwaukee Art Museum because we wanted to check out the NCECA invitational, Flow. Oh. My. Word. Not only was this museum one of the coolest spaces I have ever entered, the collection was pretty insane too. Great spacious galleries perfect for large-scale minimalist works. Here's the breathtaking entry hall:
As far as the work for NCECA's Flow goes, the always-amazing work of Beth Cavener Stichter seemed to have been THE most-photographed image of the entire conference. Every time I see new work of hers, she tops herself all over again. Here's her jaw-dropping work in the museum:
No words.
So that's about all until 2015, when NCECA hits Rhode Island. We're all pretty much recovered from the whirlwind week, but once again, to all of our customers and everyone who stopped by our booth to check out our products and chat, THANKS! You make this fun stuff even more fun. 'Til next year!
Wednesday, March 12, 2014
Catalyst Tools come to NCECA!
Wow, the past few weeks have been a blur as we've been preparing for NCECA. I'm very excited to go to the conference, where I'll be demo-ing Catalyst tools by Princeton Artist Brush Co.. The Ceramic Shop has been carrying their various silicone blades and wedges and plastic contour ribs for about a year now, and our customers have been very happy with the unique patterns and high quality of these products. I'm a convert too, using them for my own work very frequently now. I've done a few posts about NCECA demos I've made using various Catalyst tools, so I figured today I would highlight some specific items that I happen to like, a LOT, and use for a few different things.
So Catalyst tools are made by a company that specializes in artist brushes -- this is why the silicone blades have such nice, ergonomic wooden handles. I have found they just feel really good to use, and that makes a big difference when you're in the studio and go to reach for a favorite tool. Likewise, the wide variety of blades that Catalyst offers can perform a wide range of tasks. These two factors -- ergonomics and function -- really come together in the mini-blades, which have become our all-around studio staple here.
The awesome blade pictured above is a WORK HORSE. For anyone who does extensive small-batch glaze testing, this tool just might be your next indispensable item. Our tech, Rachel, uses this on a daily basis for mixing up 100- and 200-gram test batches. The small size and angular shape of this particular blade makes the most of your materials, pulling every last bit of glaze out of the corners of your tiny test sieve. The blade also holds up in the long term; forcing glaze tests through a screen can be rough on soft tools, but these high-grade blades really hold up over time. There are several different versions of this blade, too, with shapes that can carry out many different tasks.
Another thing that this blade is awesome for is compressing the bottom of smaller, closed-neck forms. I make a lot of tiny cups, for example; because I have giant hands and can pretty much palm a basketball, my anatomy can, uh, get in the way a bit when throwing. This blade has solved my problems on this front and you would never know the resulting work was made by someone with digits the size of ballpark franks.
So Catalyst tools are made by a company that specializes in artist brushes -- this is why the silicone blades have such nice, ergonomic wooden handles. I have found they just feel really good to use, and that makes a big difference when you're in the studio and go to reach for a favorite tool. Likewise, the wide variety of blades that Catalyst offers can perform a wide range of tasks. These two factors -- ergonomics and function -- really come together in the mini-blades, which have become our all-around studio staple here.
One blade to rule them all.
The awesome blade pictured above is a WORK HORSE. For anyone who does extensive small-batch glaze testing, this tool just might be your next indispensable item. Our tech, Rachel, uses this on a daily basis for mixing up 100- and 200-gram test batches. The small size and angular shape of this particular blade makes the most of your materials, pulling every last bit of glaze out of the corners of your tiny test sieve. The blade also holds up in the long term; forcing glaze tests through a screen can be rough on soft tools, but these high-grade blades really hold up over time. There are several different versions of this blade, too, with shapes that can carry out many different tasks.
Another thing that this blade is awesome for is compressing the bottom of smaller, closed-neck forms. I make a lot of tiny cups, for example; because I have giant hands and can pretty much palm a basketball, my anatomy can, uh, get in the way a bit when throwing. This blade has solved my problems on this front and you would never know the resulting work was made by someone with digits the size of ballpark franks.
Next up! The Catalyst wedge. Like the catalyst blades, these hearty wedges are made from soft, yet tough, silicone. While the patterned edge of each wedge is tapered, the 'grippy' end of the wedge is really thick -- about 3/4" -- so you can really get a good grip on it when you're throwing on the wheel and your hands are covered in water and slippery clay. I just really like the pattern on the wedge pictures above, which is the Catalyst Silicone Wedge Rib 2 -- love those sharp angles! Here's a detail shot of the profile the wedge creates:
Standard 259, bisqued to ^06.
As highlighted in a previous post, these textured wedges, along with the stiffer contour ribs shown below, can also create great patterns in handbuilt slab work -- they're great for making handles, say, that compliment your wheelthrown forms. If anyone has used these tools and gotten a unique/awesome/fun result, we would love to hear from you! In the meantime, I'll be packing up our tools for the conference, just a short six days away!...
We have Contour Ribs for your every need!
Tuesday, February 25, 2014
Chatting with Justin Rothshank
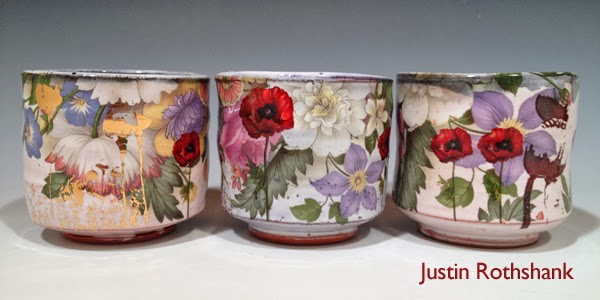
Maybe you've noticed some fancy work displayed on our website's decal page -- that's the work of Justin Rothshank, master of pots, decals, and all things surface decoration. Here at The Ceramic Shop, we've long been a fan of his complex, layered work, and now that he's been working with gold luster decals -- our new obsession! -- we love it even more. Justin was kind enough to take time out of his busy schedule to answer a few questions about his process, his workflow, and his motivations. Enjoy!
What is
your driving force to create?
It's twofold. First, I love to experiment, learn, and test. I look forward to working
in the studio every day. Whether it's trying new forms for pots, making new
decals, testing new glazes, or firing kilns in a different way the rewards of
making and getting better at what I do are what drive me.
Second,
selling what we make is how my wife and I support ourselves and our family.
There's nothing like a mortgage payment or health care bill to keep you
motivated everyday.
Describe
a typical day in the studio.
I load
or unload a kiln nearly everyday. If theres a kiln to unload in the morning,
that's usually the first thing I do. I pack and ship pots several days a week.
If there's a way to put that off till later, I usually do!
Most
studio weeks rotate between a bit of glazing, a bit of making new pots, and a
bit of decorating with decals. I fire kilns 3-6 times of week depending on
production needs. I need to fire my pots 3-5 times each to complete my
decorating process.
I try to
photograph pots daily. I spend a few hours a week designing decals, and doing
computer work.
While
all of this seems like a jumble of tasks, I find a regular routine pretty
easily, and work 40-60 hours a week depending on the season.
What are
your favorite tools -- what can you not live without?
My
favorite throwing tool is a green rib from mudtools. I have a pair of red
handles scissors that I've been using for the last 10 years that are extremely
important to me for cutting out decals. Lastly, my kilns are critical to my
process and I spend a remarkable amout of time with them!
Is there
a person place or thing that was most influential in your decision to pursue a
career in the arts? This could be a teacher, a trip you took, a book, etc..
My wife
is a critical partner in my process. While she doesn't work with me in the
studio (she has her own studio for painting/drawing) her support and knowledge
of my life as a working artist has been very influential.
Secondly,
I've had a series of supportive friends over the past 10 years who have given
me guidance, shared advice, and directed me to answers for technical problems,
business solutions, and career support.
What
advice would you give someone who is looking to pursue a career in ceramics?
Whenever I'm asked this
question I always answer the same thing. Make lots of work. Tons of work. You
get better thru dedicated practice and there is no replacement for time spent
making.
..................................................................................................................
If you want to see more of Justin's awesome work, check out his website here: http://rothshank.com/justins-work/
Friday, February 14, 2014
The Cash Money Blues
I've been making a bunch of demos for our upcoming NCECA demonstration table, and I've been having a blast doing it. Making pottery for work? Livin' the dream, right? Previously I wrote about the Catalyst tools by Princeton Artist Brush Co. that I used to create my wheelthrown forms; today, I'm going to talk about glazing. I just opened my little ConeArt test kiln this morning, and here are my results -- not too shabby!
These forms were made with Standard Stoneware 259, which is a very easygoing claybody for throwing. Very forgiving with enough grog to make you feel kinda tough, this is a claybody that turns an extremely attractive toasty brown in reduction. Because I primarily fire oxidation here, though, I needed my glazing to punch up the electric kiln results. Luckily, here at The Ceramic Shop we make our own Professional Cone 6 Glazes here that aim to do just that, so I had plenty of options.
The mug pictured in back is glazed in the Ceramic Shop's cone 6 Tomato Luster. This glaze has always been reasonably popular, but for me, it's one of those glazes that I have become fanatical about over the past few months. It's a workhorse -- delivers beautiful results with incredible consistency across a variety of claybodies, and has this gorgeous, variegated surface complete with tiny green crystals. Here's a picture of Tomato Luster over some mugs I made from the deep dark Standard Stoneware 266, fired, again, to cone 6 oxidation:
Here is a close-up detail of those awesome little green crystals:
The other two mugs pictures in the top image were glazed with The Ceramic Shop's deep cobalt-blue cone 6 offering, Cash Money Blue. It's rich enough to pop up a beautiful deep blue on most claybodies (save for the very darkest, such as Standard 266), but has just enough translucence to allow the underlying body to peek through. This works great for me, because I love the juxtaposition of glazed surface and raw claybody -- and I toyed with just this in my NCECA demo mugs. With the mug on the top left, for example, I simply dipped it and then let it dry; once I could handle the dried glaze, I took a moist (but wrung-out) sponge and removed the glaze from the bottom and the lower surface. This just left behind some glaze in the mug's textured cracks, resulting in that shiny glaze/matte clay look that I love so much!
"But Gina," you may ask, "what about all of that glaze run-off you create when you wipe perfectly good glaze off with a sponge?" Fair enough, good people of the internet -- and there's an easy answer for you. Because I have the storage space here at work to do this, I keep a series of well-labeled deli pint containers (with lids) filled with water. Each container corresponds with a glaze that I use frequently, so when I elect to do a wiped finish, as seen above, I can simply dip my little yellow sponge into the water and the remnants of that glaze collect in a contained space. Once I accumulate enough wiped-off glaze, I simply drain off the clear water once it has settled out and am then able to fully reconstitute that run-off back into a glaze, with no worries about contamination.
If you are looking for reduction-worthy results from your cone 6 oxidation firings, consider our Professional Cone 6 glazes -- and, as always, we welcome your own tips for application and images of your work using our glazes as well!
Mean muggin'.
These forms were made with Standard Stoneware 259, which is a very easygoing claybody for throwing. Very forgiving with enough grog to make you feel kinda tough, this is a claybody that turns an extremely attractive toasty brown in reduction. Because I primarily fire oxidation here, though, I needed my glazing to punch up the electric kiln results. Luckily, here at The Ceramic Shop we make our own Professional Cone 6 Glazes here that aim to do just that, so I had plenty of options.
The mug pictured in back is glazed in the Ceramic Shop's cone 6 Tomato Luster. This glaze has always been reasonably popular, but for me, it's one of those glazes that I have become fanatical about over the past few months. It's a workhorse -- delivers beautiful results with incredible consistency across a variety of claybodies, and has this gorgeous, variegated surface complete with tiny green crystals. Here's a picture of Tomato Luster over some mugs I made from the deep dark Standard Stoneware 266, fired, again, to cone 6 oxidation:
Toasty situation.
That's rich.
The other two mugs pictures in the top image were glazed with The Ceramic Shop's deep cobalt-blue cone 6 offering, Cash Money Blue. It's rich enough to pop up a beautiful deep blue on most claybodies (save for the very darkest, such as Standard 266), but has just enough translucence to allow the underlying body to peek through. This works great for me, because I love the juxtaposition of glazed surface and raw claybody -- and I toyed with just this in my NCECA demo mugs. With the mug on the top left, for example, I simply dipped it and then let it dry; once I could handle the dried glaze, I took a moist (but wrung-out) sponge and removed the glaze from the bottom and the lower surface. This just left behind some glaze in the mug's textured cracks, resulting in that shiny glaze/matte clay look that I love so much!
Won't you join me for a drink?
"But Gina," you may ask, "what about all of that glaze run-off you create when you wipe perfectly good glaze off with a sponge?" Fair enough, good people of the internet -- and there's an easy answer for you. Because I have the storage space here at work to do this, I keep a series of well-labeled deli pint containers (with lids) filled with water. Each container corresponds with a glaze that I use frequently, so when I elect to do a wiped finish, as seen above, I can simply dip my little yellow sponge into the water and the remnants of that glaze collect in a contained space. Once I accumulate enough wiped-off glaze, I simply drain off the clear water once it has settled out and am then able to fully reconstitute that run-off back into a glaze, with no worries about contamination.
If you are looking for reduction-worthy results from your cone 6 oxidation firings, consider our Professional Cone 6 glazes -- and, as always, we welcome your own tips for application and images of your work using our glazes as well!
Tuesday, February 11, 2014
Meet our glaze tech, Rachel.
Here at the Ceramic Shop, we don't just act as pottery suppliers -- we produce quite a bit of our own material, as well. From HydroBats and kiln posts to glazes and wax products, all of our own-brand items go through a rigorous and extensive period of development, testing, and more testing.
So who, exactly, is behind this development and testing? While we have many different people working on a variety of different projects, our head glaze tech, Rachel, runs all of our glaze- and ceramic-based product development. Rachel has been part of The Ceramic Shop team for over a year now, having come to us from the highly-respected ceramics program at the University of Oregon. There, she was truly well-trained when it comes to glaze and claybody formulation -- this is training she uses, and develops further, every day in the lab that she runs here. In the world of ceramic artists, there are just some people who are true materialists, and Rachel is the type of person who has a LOT to say about nepheline syenite (and molochite...and cryolite...). Basically, if you spend just five minutes in her work space you know this goes beyond extensive knowledge -- it's a passion for her. She's even a published author on this front -- check out her great project on the effects of sintered borax in Clay Times!
Since joining our team, Rachel has tackled numerous contract projects and has definitely proven her salt. And yes, she also has plenty to say about salt! Because of this, she is now serving as a consultant for glaze-specific projects here at The Ceramic Shop. Say you have to do a bunch of cone 6 glaze tests for your arts center, home, or classroom, and you either don't have the time, know-how, or simply lab access -- Rachel can do all of this for you, complete with well-documented results. Say you are looking for just the right butter yellow matte glaze for your stoneware, and you really just don't know where to begin - for a consulting fee, Rachel can do the research and then mix up and tests the glazes. Perhaps you have a project that's a little more production-based -- last year, Rachel took on the glazing and firing of about 1500 very precise and fragile elements for a major installation. When it comes to clays and glazes, she can do it all!
Our consulting fee for this service begins at a reasonable $50/hr. If you would like to get a quote for a project, you can give us a call at 215-427-9665 or email Mark at mark@theceramicshop.com or Rachel at rachel@theceramicshop.com.
We don't play.
So who, exactly, is behind this development and testing? While we have many different people working on a variety of different projects, our head glaze tech, Rachel, runs all of our glaze- and ceramic-based product development. Rachel has been part of The Ceramic Shop team for over a year now, having come to us from the highly-respected ceramics program at the University of Oregon. There, she was truly well-trained when it comes to glaze and claybody formulation -- this is training she uses, and develops further, every day in the lab that she runs here. In the world of ceramic artists, there are just some people who are true materialists, and Rachel is the type of person who has a LOT to say about nepheline syenite (and molochite...and cryolite...). Basically, if you spend just five minutes in her work space you know this goes beyond extensive knowledge -- it's a passion for her. She's even a published author on this front -- check out her great project on the effects of sintered borax in Clay Times!
Shhhh! A Rachel in her natural habitat.
Since joining our team, Rachel has tackled numerous contract projects and has definitely proven her salt. And yes, she also has plenty to say about salt! Because of this, she is now serving as a consultant for glaze-specific projects here at The Ceramic Shop. Say you have to do a bunch of cone 6 glaze tests for your arts center, home, or classroom, and you either don't have the time, know-how, or simply lab access -- Rachel can do all of this for you, complete with well-documented results. Say you are looking for just the right butter yellow matte glaze for your stoneware, and you really just don't know where to begin - for a consulting fee, Rachel can do the research and then mix up and tests the glazes. Perhaps you have a project that's a little more production-based -- last year, Rachel took on the glazing and firing of about 1500 very precise and fragile elements for a major installation. When it comes to clays and glazes, she can do it all!
Our consulting fee for this service begins at a reasonable $50/hr. If you would like to get a quote for a project, you can give us a call at 215-427-9665 or email Mark at mark@theceramicshop.com or Rachel at rachel@theceramicshop.com.
Subscribe to:
Posts (Atom)